Showing posts with label baby. Show all posts

February 28, 2013

oliver + s cozy winter hoods

This week I worked on a couple of baby hats for two friends who are having babies in the spring. I've had the book, Oliver + S Little Things to Sew for over a year now, and this is the first project I've made from it: Cozy Winter Hood.


I made the extra small (6-12 month) size, which is quite roomy for my little one's head. It fits Morgan with room to grow, and it even fits Marcus - who is four years old! Now, Morgan does have a large noggin, but I think this size will even fit her perfectly next fall when she is around 20 months old (I'm totally making her one of her own!).


With their typical intense dislike for hats, the tie-on feature of this hood is perfect for a toddler. I couldn't wrestle my toddler down to tie that ribbon any tighter during this particularly rough photo shoot.


The hood is pretty darn cute when it is untied, too! The exterior of both hats is corduroy, and the interior is flannel. The boy hat is a little sturdier due to both the corduroy and the flannel (Riley Blake) being a little heftier. But, the girl hat is just as soft and warm - only a little bit floppier.


I decided not to hand stitch the ears upright as the pattern suggests - I liked how charming they looked when the ears were askew. I also did the whole blind stitch deal in the lining on the girl hat, but decided to just turn the boy hat out from the bottom back and topstitch around to close it up. Then I ended up topstitching the girl hat because it looked a little more tailored. One more note - I used Elmer's glue on the ribbon ends to prevent fraying. I know that won't hold up, but fabric glue (as pattern recommends) can be toxic (at least the kind I have is) and don't babies put ribbons in their mouths?

Love, love, love this hood. Super easy and insanely adorable!

:) Shelly

August 31, 2012

a t-shirt dress

There hasn't been much sewing over here this summer. It has been a busy few months with all three kiddos at home and lots of fun in the Seattle summer sun (sometimes sun, anyways). Even though I've missed the time in front of my sewing machine, I am happy that I spent most of my summer evenings sitting on the front deck instead. After (finally) hemming Charlie's karate uniform one night, I did mess around with making a t-shirt dress for Morgan.


This t-shirt is actually a onesie that suffered the devastating effects of a horrible poop-splosion and was just never the same. I cut off the affected portion of the onesie and sewed on a skirt. My big mistake was that I didn't make the skirt full enough, which made it Miss Kicks-a-lot's least favorite outfit. It was a beneficial learning process - t-shirt dresses are cheap and easy to make and can be really cute. I'm sure I'll be making more in the future. (By the way, this photo of Morgan was taken over 6 weeks ago, which give you an idea of how long its been since I sewed anything - sniffle, sniffle).


Here she is at just about 6.5 months old, demonstrating her most recently learned trick. She's become a real chunk, right?! Did you notice those "fat sleeves"?

Morgan and I just took the boys shopping at JoAnn's for Halloween costume patterns. We have a plan, and I hope to acquire fabric and start sewing this weekend.

:) Shelly

June 13, 2012

more car seat covers

I attended two baby showers this past weekend, and I managed to squeak out a couple of car seat covers for the expecting moms using this wonderful tutorial from Make It Do. 


This one was for Molly, who is having her first baby boy this summer. I laughed at myself for picking out yet another bird print - my obsession kind of reminds me of Portlandia's Put a Bird On It.


I tried to make Molly's cover more gender-neutral so that she can use it again if she has another child.


One thing about these covers - you can flip them around once baby gets old enough to be interested in dangling toys. Here's a shot of mine with the outside print on the inside so that toys can hang from the handle for Morgan.


This cover was for Sarah, who is having her second baby girl this summer. She's told me that she's done having kids after this little one comes along, so I decided to really pink-it-up for her.


The fabric for the covers is all from JoAnn Fabrics, and the outer print of Sarah's cover is Heidi Grace.

I can't wait to meet these summer babies! And, I am excited for summer to finally begin around here (it is June and I am wearing a down vest in my house! Oh, Seattle!).

:) Shelly

June 7, 2012

baby bibs

A fun sewing project that uses up scraps... perfect! Plus, Morgan really needed some pretty bibs. Dressing her in all of those darling girl clothes is less fun when she is wearing a stained car bib that says "zoom zoom" on it. 


I used this tutorial I found at Zaaberry. The tutorial is very well written, and these bibs are super easy to make!


I loved revisiting some of these fabrics, especially the two prints used in the bib on the left - one from Amy Butler's Midwestern Modern line and another print I found at a cool fabric shop in Wallingford that unfortunately closed up.


And there are those birds again!


The best part about this tutorial is that you just use a bib that you already like as your pattern, trace or pin it onto your fabric pieces (wrong sides together), sew with a gap for turning, THEN cut out the bib. Love that. No matching up the two pieces.


Here's the world's cutest bib model at 3.5 months old.


Now she has something to keep her top dry with and to clip her pacifier to!

:) Shelly

May 15, 2012

pacifier strap

Today I found a little sliver of time in which to do a little bit of sewing. I actually used a larger chunk of free time last week to sew this same project, but it went horribly wrong. And, it was such a simple project. Boy, am I rusty.


First, here's Morgan. She is almost three months old! And, no, I'm not trying to suffocate my child with that ridiculously huge pacifier strap. In case you haven't guessed, that is the project that went horribly wrong. How could I so grossly mismeasure?! It is quite unbelievable! I blame that very cute fabric - it is like the bad luck fabric (there was another project a while back that went horribly wrong with that fabric that I never reported on). I suspect the birds' hypnotic stares render my sewing skills useless.


Ah, now that is more like it. A small, simple pacifier strap. I based the design off of MADE's pacifier clip tutorial. If I only had a serger, this project would have been perfect for me. But, the no-serger method is too much work for such a simple product.


So, all I did was use MADE's dimensions and simplify the process:
1. Cut two 1.5" wide by 14" long strips.
2. Sew them wrong sides together, leaving a large gap on the side for turning.
3. Clip corners and turn right side out, using a chopstick or turning tool to push the corners out.
4. Iron, then topstitch all the way around.
5. Place suspender clip  3/4" from bottom, turn up end so that back sides are together, stitch across.
6. Stitch 1" piece of velcro (fastener side) at other end on back side of strap.
7. Stitch 1"piece of velcro (soft side) about 3" down from the top end of strap (on the back side of strap).


It was a very simple, quick project. I should have taken the time to change my thread to, I don't know,  maybe something that coordinated a little better with the fabric?! Now you can all see how messy my lines are. Oh well, I just managed to squeak this project out before Little Miss woke up from her nap and we had to prepare to fetch her big brother from preschool. So, I'll take what I can get. It was a quick stitch, though... and I know a few babies who are about to be born who may just be receiving one of these handy little straps!

:) Shelly

April 29, 2012

new burp cloths

It's pretty crazy that Morgan is already 10 weeks old! She is such a little delight, and we've all been having so much fun with her. 


I sat down at my sewing machine for the first time since this little lady was born. It turns out, she is a wonderful sewing apprentice. She just played on her kick-around blanket and shot me some big grins.


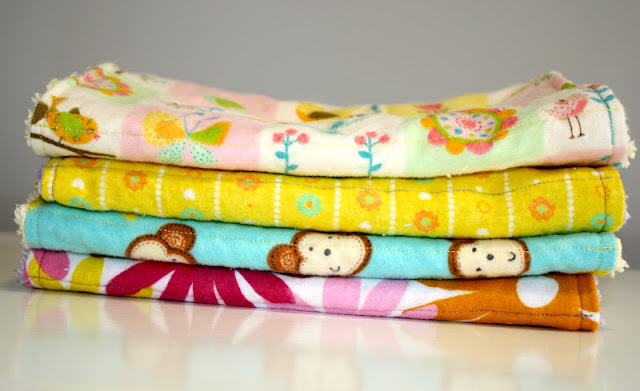
Then she got tired and decided to snuggle up in what we call her Queenie Chair (thank you, Andrea!) to take a nap. She is covered up with one of the burp cloths I sewed up for Marcus shortly after he was born. I made four of these terry cloth and flannel cloths, and they are the best. I made them before I started blogging, but they are much like the ones I made here for my friends' baby. They're getting pretty worn, though - and they are super boy style with robots and cars on them - so I decided to make some new ones this morning.


Ta-da! I made these a little bit narrower than the old ones, using the 10x18" dimensions that MADE suggests (because everything she makes seems to turn out perfectly!). You can look at her tutorial here.


I also used the chenille-style fabric for the backing rather than the terry cloth. I think it will stay softer longer, and it looks nicer, too. I was shopping for white, but Pacific Fabrics only had yellow and purple, so I gave those a shot. Turns out a little extra color is quite nice. The flannel I used are all scraps from other projects. That bird print flannel is so stinking cute - I should have bought the whole bolt instead of just a couple of yards. Sadly, I think that is the last of it (unless I can squeeze a little bib out of the tiny scrap that remains).


I'm not going to lie to you here... having three kids is really hard. Everyone's piece of the mommy pie got a little bit smaller when Morgan was born, and it seems that my own piece took the greatest size reduction (though Chris would argue that his was hit the hardest). I just don't seem to have any time to do stuff like sew anymore... unless something happens like CHRIS TAKES THE BOYS CAMPING FOR THE WEEKEND! Yes, I love the boys, but it was really fun to have some girl time with Morgan this weekend. And, I got a chance to introduce her to her future best friend - the sewing machine. Plus, I got to do other, more mundane things - like eat all of my lunch and take a shower alone. Bliss.

Did you notice that there is another project already started in that picture? I'm hoping that I can squeeze some sewing time in here and there - maybe even tonight! Sewing makes me so happy - almost as much as those crazy kiddos do!

:) Shelly

March 10, 2012

Morgan and her quilt

I'm sorry for the long absence from my blog. I had a baby girl! She was born on her due date, February 20th. We named her Morgan Frances, and we've been very busy falling in love with her these past few weeks.


Morgan is still pretty sleepy. And she is fairly tiny - she weighed in at 6lb 13oz at birth. This was taken the morning after we came home from the hospital.


We think she is pretty darn cute. She actually looks just like Charlie when he was a baby. The boys are both pretty smitten with her.


Just a couple of nights before she was born, I finished her quilt. I made it using the pattern from Little Stitches for Little Ones by Amy Butler.


I was pretty pleased with how it turned out. It looks really good with the crib bedding, and my craftsmanship is not half-bad. I need to work on "stitch-in-the-ditch" and my binding is totally wrong (I decided not to follow the directions), but for my first quilting attempt, I am very proud of myself.


I think Morgan will enjoy lounging on this when she starts playing on the floor and engaging in tummy time. Then she can use it to snuggle up with in her toddler bed when she gets to be a big girl!


Here's the back of the quilt. I decided to bind it in a solid color because the polka dots seemed like too much when I started to cut it out for binding. I like the contrast (and the ease of using pre-made quilt binding!).


Right now Morgan is sleeping in a bassinet, so her crib is actually a very fancy laundry basket.


But, she is getting bigger every day. So, I better break my laundry basket crib habit. Here she is at almost 3 weeks old (and about to clear 7 lbs!). She is definitely waking up a little bit now. She is sweet as pie!

I'm not going to kid myself... the sewing is pretty much at a standstill at this point. I'm talking serious dust on the machine. When I'm back on the horse again, I'll post a new project. I do have a nice little stash of little girl prints to tackle, after all.

:) Shelly

February 14, 2012

baby bedding

With about five days until my due date, the sewing has been slowing down a bit. I have been getting things ready in the house for baby to come, including finishing up her room. 


We bought a twin sofa sleeper for the baby's room so that I can sleep comfortably with her apart from my husband (who has trouble falling back asleep once he wakes in the night). Since he has a long commute and a challenging job to go to everyday, I don't mind the sacrifice. I bought cute sheets for the bed on sale, but the pillowcases were regular price (and way too expensive!), so I decided to make a couple of cases out of some fabric remnants that I picked up at JoAnn's.


I used this tutorial from MADE, but I totally forgot about the directional fabric warning. So, this pillowcase is sideways. I was already sewing it together when I realized it, so I just went with it.


This one turned out better. I love those little fairies! I figure these will be nice and comfy for me to use on the twin bed, then I can save them for my little girl to use when she moves to a toddler bed.


Here's her crib. I had originally wanted to make all of the crib bedding, but when I found this bumper and crib skirt on clearance at Land of Nod, and these Pottery Barn sheets for $8, I figured I couldn't make crib bedding for less money. And it all matched the room so well!


I did decide to make the quilt using Amy Butler's Little Stitches for Little Ones quilt pattern. So far I have just pieced the quilt together. I still need to baste the backing on, stitch-in-the-ditch, and attach the quilt binding. This is the first quilt I've ever made, and I am really enjoying it.


I used Michael Miller/Sarah Jane Children at Play (pinwheels, pinkish floral pattern, and pink and white polka dots for backing), Riley Blake Sugar and Spice (green floral), and one of the clearance sheets I bought from Pottery Barn. I am still debating whether to use the pink dot for binding or to bind it in solid pink so that it is not so busy. I doubt that I will finish this quilt before baby is born - I want to take my time and do it right. I'm feeling okay about that. In fact, she can come whenever she's ready! Maybe waiting at least until after tomorrow afternoon would be good - we've got the plumber coming over and I want a working bathtub again!

:) Shelly

February 8, 2012

laminated cotton messenger bag

Only about 1.5 weeks to go until my due date, and I've finished another project! I made this laminated cotton messenger bag using this tutorial from Sew Can Do.


I would be fibbing if I said this was an easy bag for me to make. I've made messenger bags before, and this tutorial is very easy to follow. However, I had some trouble with the laminated cotton, a fabric I've never worked with before. I bought this Riley Blake Sugar and Spice fabric from fabric.com. I should have read up a little bit on using laminated cotton. I also should have bought a little extra fabric than what was recommended in the tutorial - this is because I messed up on some of my cutting and because about 2 inches on the sides of the laminated cotton was not laminated! I was slightly annoyed about that!


I originally had a pretty green floral from the same Riley Blake line for the lining, but my pregnant brain got the best of me and I cut my pieces out wrong, ending up short on fabric. So, I picked up this pretty blue dot by Heidi Grace at JoAnn Fabrics instead. I actually ended up liking it better. This bag is HUGE. I'm not even close to filling it up (yet). I have a diaper/wipes case, a wet bag with spare baby clothes and spare pants and undies for Marcus, a nursing cover, and diapers in there so far and there is so much room left!


It has nice side pockets, and the laminated cotton is very soft and supple... so it collapses a bit when it is not full. I actually like that feature because the bag hugs the side of my body instead of sticking out like a big box with a strap.


Speaking of the strap, I was not so sure about the shape of this strap when I first cut it out. But, it totally worked when I put on the bag. It is very comfortable to carry. All and all, I like the bag. I'm sure the roominess will be great for the first few months with baby, and then I can downsize to the other bag I made.

I started baby's quilt last night. That will (hopefully) be my last project and will keep me busy while I wait for her arrival. This will be my first quilt ever, and so far I'm loving the process!

:) Shelly

February 3, 2012

blanket for sister

I'm feeling incredulous about the fact that my due date is just over 2 weeks away. I mean, it feels like I've been pregnant forever, but this last month also feels like it is flying by. I've come to grips with the realization that I won't be able to finish everything on my "to sew" list. I'm trying to enjoy working on this messenger bag (diaper bag) I've been obsessing about, and hoping to begin baby's quilt (which I finally finalized all of the fabric choices for). This past week the boys and I finished a small project for baby. Check it out!


One of Marcus' main concerns about the new baby is whether the baby will try to take his two blankets. Marcus is very serious about his blankets - "Star Blank" and "Truck Blank". They are both fleece blankets that were store-bought and given to me for baby shower gifts (even though Marcus has a homemade quilt from me, he prefers his store-bought blankets - oh well). I tried to reassure him that the baby would not take his blankets, but he was still skeptical. So, I suggested we make one for the baby together.


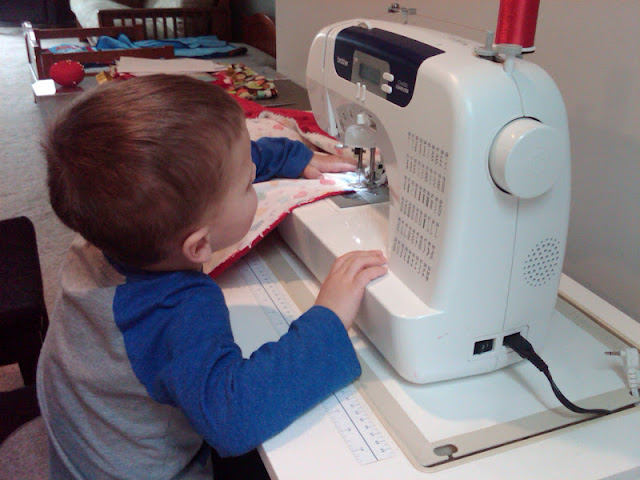
Marcus was very excited about this project. He selected the fabric himself (based on a blanket I made for Charlie long ago), and enjoyed pinning the fabric and using the sewing machine.


He also used my tiny craft iron (unplugged, of course) to pretend to iron out the blanket once he removed all of the pins and turned it out.


A few days later (in full Batman costume) Marcus invited Charlie to help finish the blanket. He chose a zig-zag stitch to topstitch the blanket.


Charlie's sewing skills have really improved - he sewed some very straight lines. The crooked, curvy ones that Marcus made are very charming, though.


The boys worked diligently to remove all of the pins and carefully replace them in the pin cushions (instead of leaving them on the floor where their dad could accidentally step on them with bare feet - ooops).


The boys plan to bring the finished blanket to the hospital when they meet their new baby sister for the first time. She has a couple of gifts for them (of the Star Wars ship variety), but I think their gift is the tops.

Hopefully I'll have a finished bag to show you soon. Tonight I can hardly get off of the couch!

:) Shelly